Documentation Index
Fetch the complete documentation index at: https://docs.textyess.com/llms.txt
Use this file to discover all available pages before exploring further.
Customize your widget appearance
Click on the “Integrations” section of the menu. From there select the “CTAs in product pages” block and personalize your widget.
Get the code snippet
From there you will find the code snippet to insert into your Shopify theme.
The code will look something like this:
The code will look something like this:
Go to the Online store section
Once inside your store click on “Sales channels” from the menu on the right.
A pop-up will appear at the top. From there click on “Online store”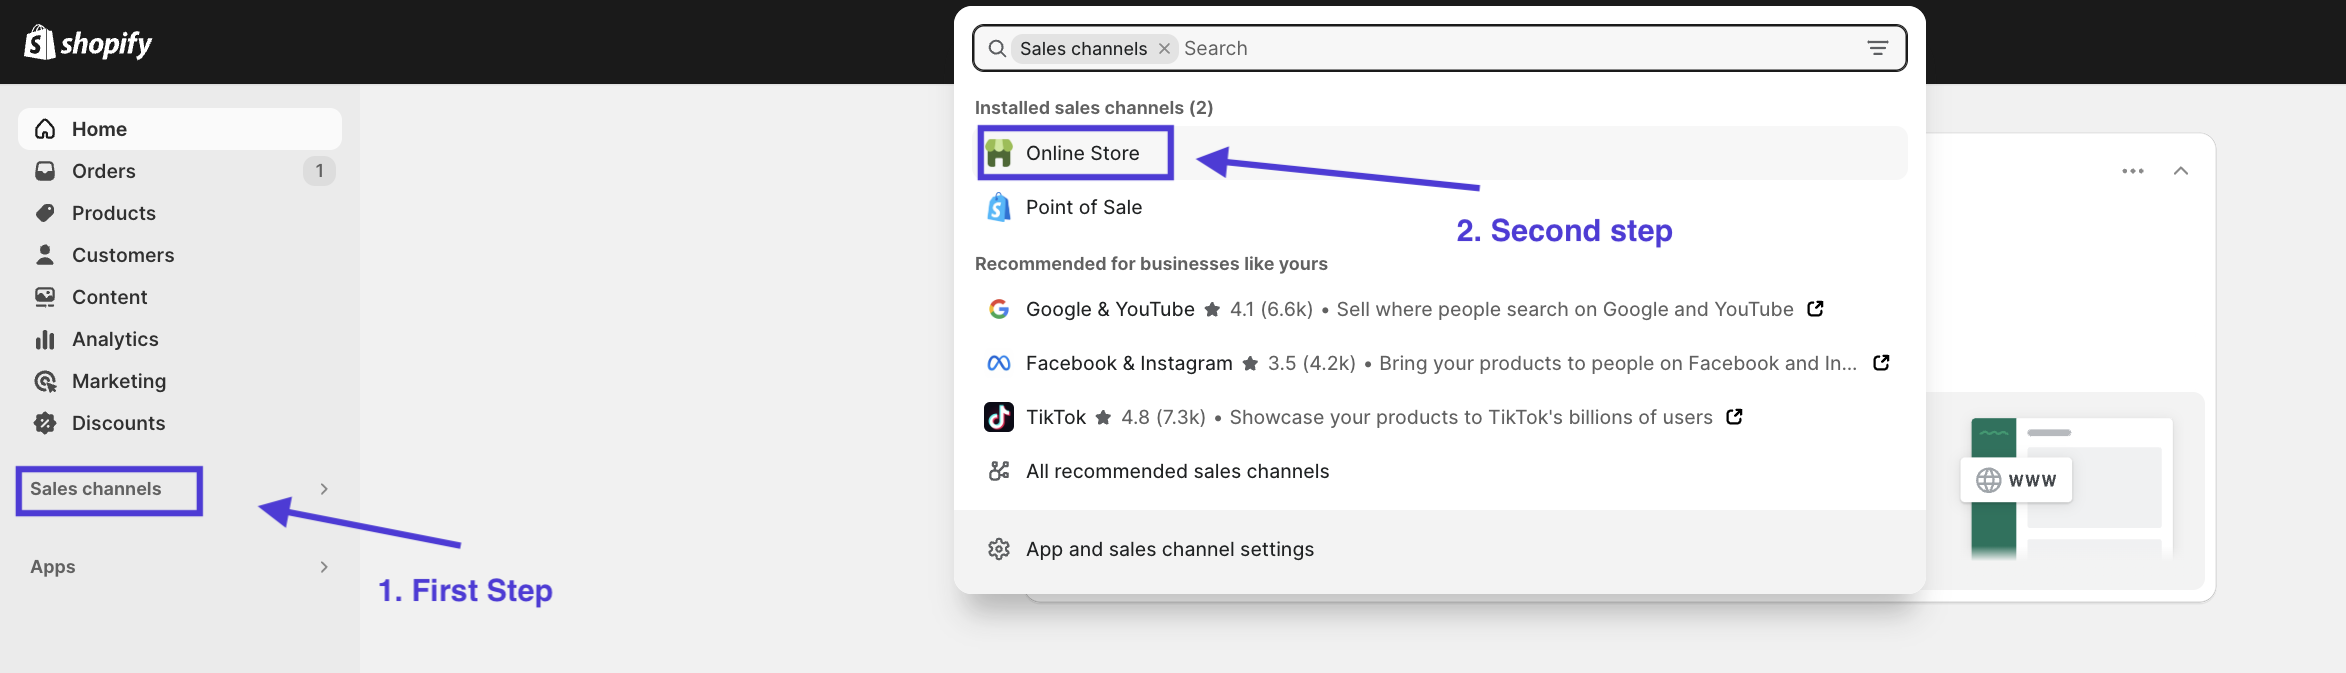
A pop-up will appear at the top. From there click on “Online store”
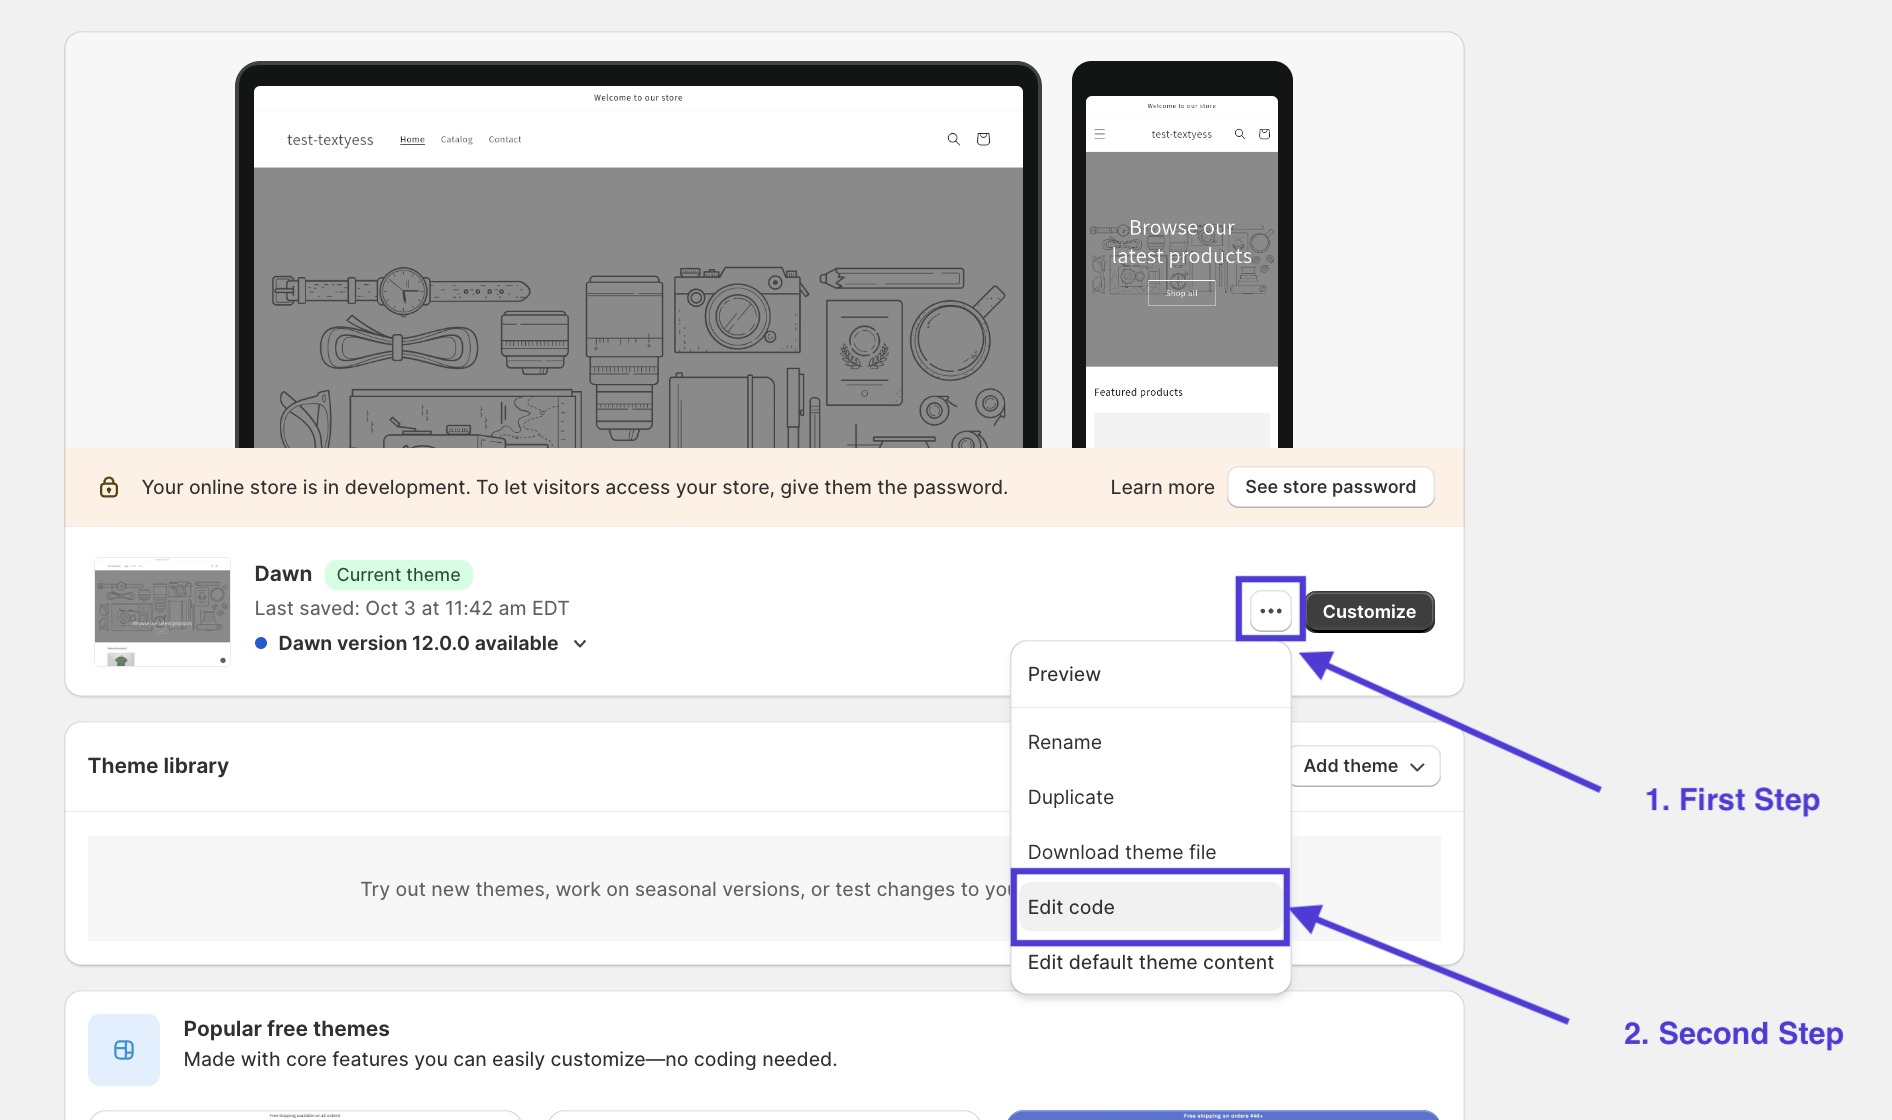
Open the Theme editor
Opening the theme editor is very simple. Just click on the three dots of the theme you want to update. Then click on “Edit code”.
Edit the file with call to actions on the product page
This may be the most complex part. In fact, each theme handles the product page and related CTAs differently. Here are some of the possible files where you will find the CTAs where to insert your widget:
We are almost finished!
Now click the “Save” button in the upper right corner, then click the “Preview store” button to make sure the widget is displayed correctly.
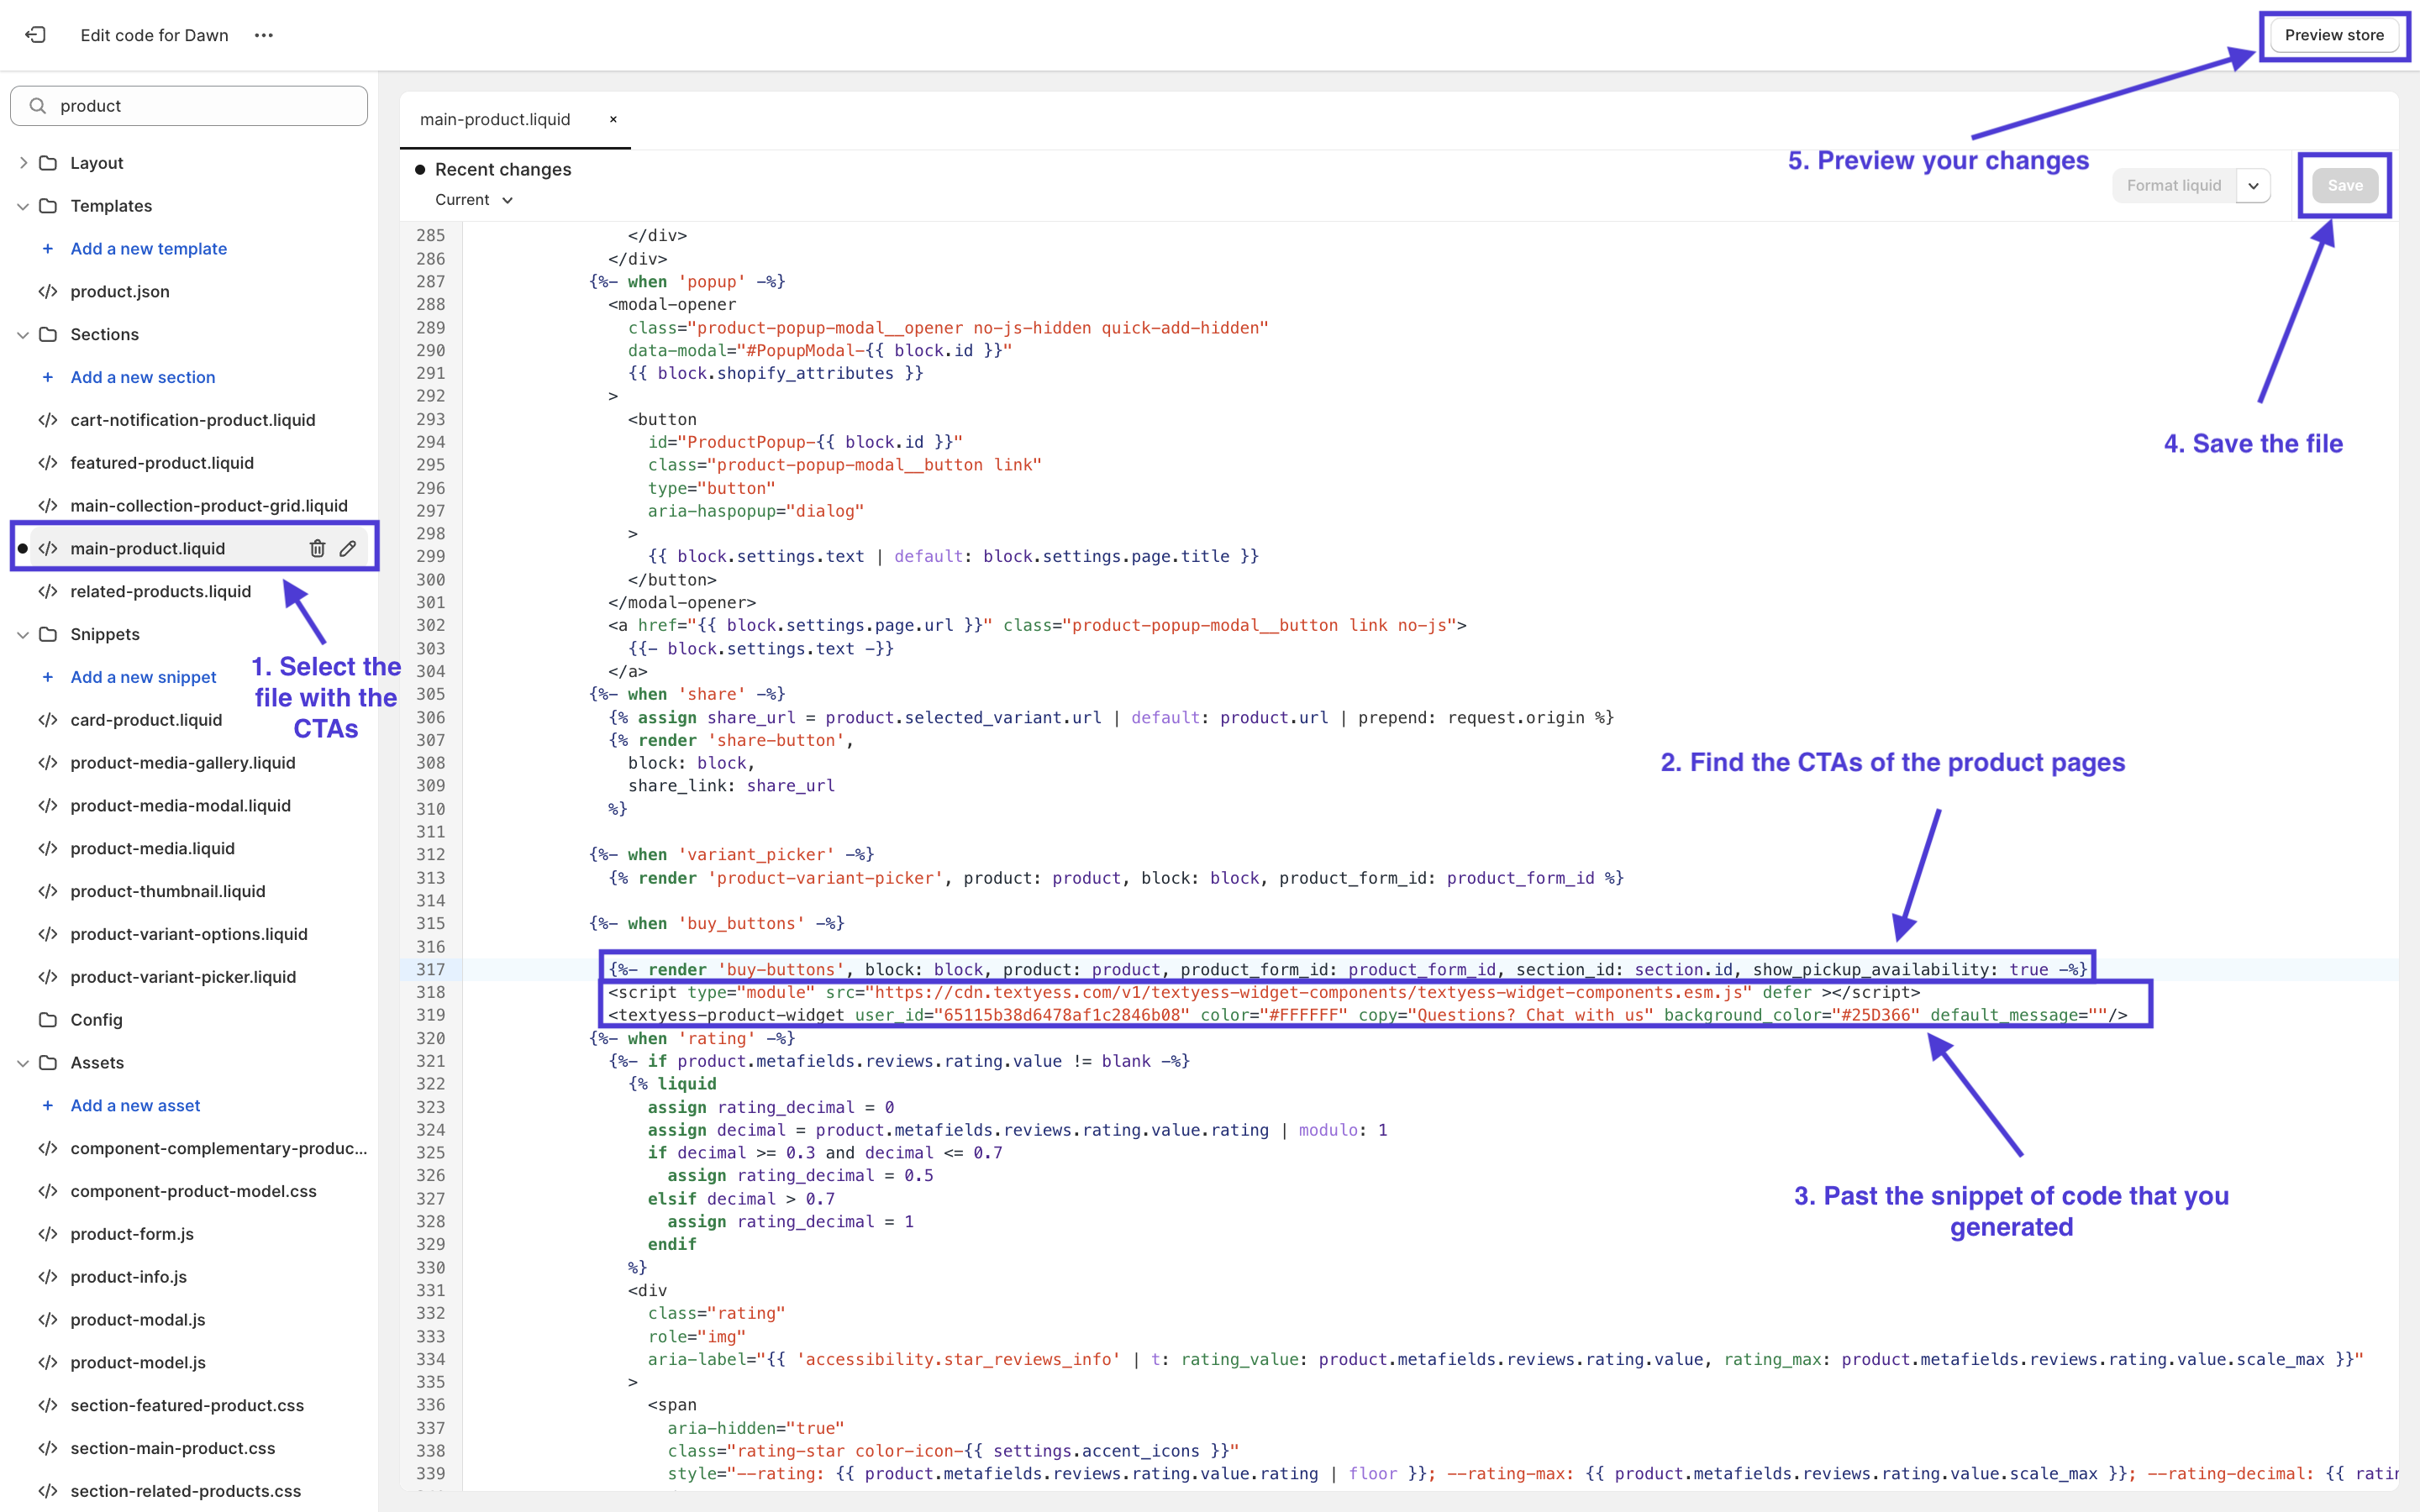
- main-product.liquid
- buy-buttons.liquid
We are almost finished!
Now click the “Save” button in the upper right corner, then click the “Preview store” button to make sure the widget is displayed correctly.
Congratulations, we are live! 🥳