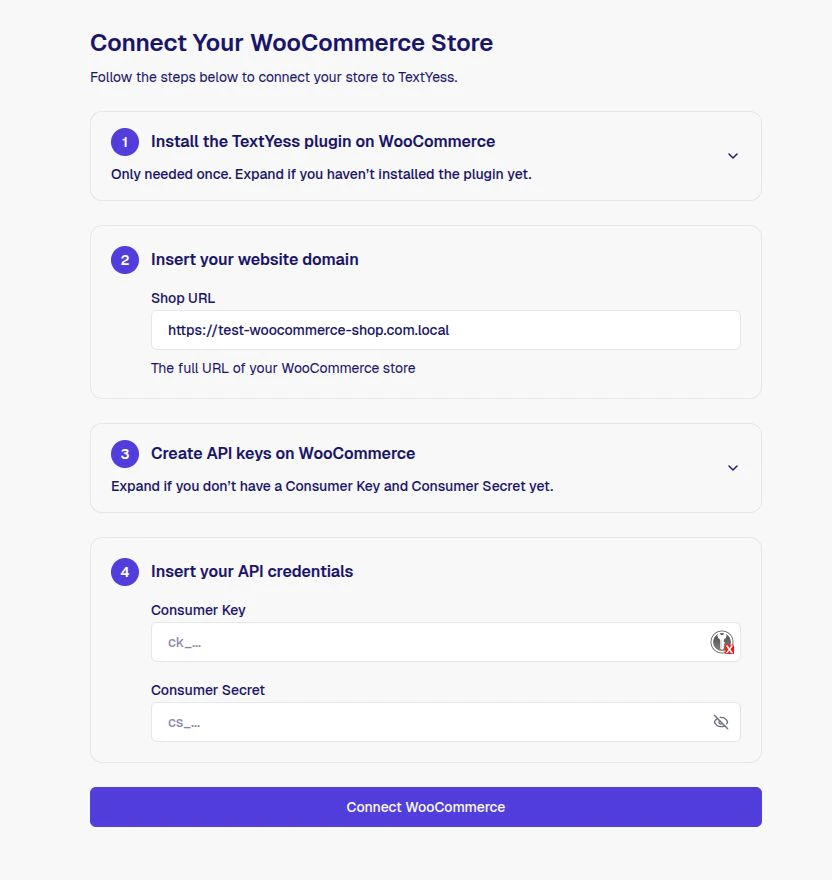
Go to the Connect Your WooCommerce Store page in the TextYess dashboard and follow the four steps below.Documentation Index
Fetch the complete documentation index at: https://docs.textyess.com/llms.txt
Use this file to discover all available pages before exploring further.
Step 1: Install the TextYess plugin
Upload to WordPress
In your WordPress admin, go to Plugins → Add New → Upload Plugin, select the downloaded
.zip, click Install Now, then Activate Plugin.See the WordPress plugin installation docs for more details.You only need to do this once. If you have already installed the plugin, you can skip this step.
Step 2: Insert your website domain
Enter the full URL of your WooCommerce store in the Shop URL field, e.g.https://your-store.com.
Step 3: Create API keys on WooCommerce
Open the REST API settings
In your WooCommerce dashboard, go to WooCommerce → Settings → Advanced → REST API.
Generate and copy
Click Generate API key and copy both the Consumer Key and Consumer Secret.See the WooCommerce REST API docs for more details.
Step 4: Insert your API credentials
Paste the Consumer Key and Consumer Secret from Step 3 into the corresponding fields, then click Connect WooCommerce.Your store is now connected. TextYess will start importing your product catalog automatically.
Having trouble? See the troubleshooting guide.